Wednesday, November 16, 2011

A Warming Answer to Nature's Freak Show

Snow-kale-484.jpg

Fresh air is great. So are vegetables from the backyard garden. Watching the deer mill about under the apple trees is a very pleasant sight just after the sun rises. But the thing I love most about living in the country is the subtle day-to-day change of the seasons. You need to pay close attention to notice it, but every morning comes a bit later these days, every evening a bit earlier--and the colors of the leaves and the sun are in constant, gentle flux.

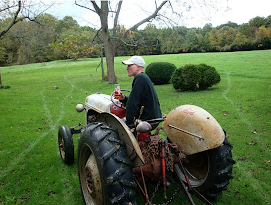
Then, last weekend, we had a freak-show blizzard that ruined everything. As of this writing, we still don't have electricity at the farm. What we do have is perfectly frostbitten kale that came a little early this year, thanks to that snowstorm.


sunny-kale-484.jpg

Kale, along with other dark, leafy greens (collards, cabbage), is resistant to cold weather thanks to its thick, succulent, waxy leaves and stems, which is why it's prominent in cooler-weather cuisines (Eastern European food exalts the cabbage). But the plant also contains off-putting chemicals whose bitter taste makes some folks wince. It has to do with things called glucosinolates, and you can check out Harold McGee's On Food and Cooking to learn more about this sort of stuff than you probably want to know. The point is that the colder weather mellows those off-putting flavors and lets the sweetness of the leaves come through.That's good news for me because not-so-subtle cold snaps demand a warming reaction: soup!

Kale-Soup-484.jpg

Dinosaur Kale and White Bean Soup
4 servings

INGREDIENTS

1 cup dried navy beans, soaked overnight
1 bay leaf
1 sprig thyme
1/4 cup extra-virgin olive oil
1 large onion, chopped
3 garlic cloves, thinly sliced
Kosher salt
Freshly ground black pepper
1 large bunch dinosaur kale (also known as Tuscan kale, black kale, and Lacinato; but feel free to sub in any variety of kale you may have)
1/3 cup finely grated Parmesan

PREPARATION

Drain beans, then transfer to a medium saucepan and add cold water to cover by 2" (at least six cups). Add bay leaf and thyme. Bring to a boil and cook until beans are tender, about 45 minutes.

Heat oil in a large heavy skillet over medium-high heat. Add onion, garlic, 1 tsp. salt, and 3/4 tsp. pepper and saute until onion is soft and garlic begins to brown, about 6 minutes.

Add onion mixture to beans in saucepan. Tear kale leaves into large pieces, discarding stems, and add to soup. Boil soup until kale is tender, 8-10 minutes. Season with salt and pepper to taste. Serve soup sprinkled with cheese.

Thursday, November 3, 2011

A Squirrel in Every Pot

Braied-Glazed-Squirrel-484.jpg

This may surprise you, but I didn't eat my first squirrel until I was well into my adult years, and it wasn't at the farm, or even in this country: It was in jolly old England, where squirrel has been all the rage for a couple of years. (The Brits are either more enlightened or less so than we are, depending on your worldview.)

I was at St. John restaurant and the chef, Fergus Henderson, was running a squirrel special. Before the waiter had finished describing it, I was eagerly nodding yes. The dish was served with porcini mushrooms and a deeply porky sauce, and I have to say, it was really, really good. The meat was a little bit woodsy, a little bit rabbitlike but unique unto itself. There was no doubt that I was eating game.

dead-and-cute-484.jpg

I shot my first squirrel early one morning last winter. The little critter had moved into the attic of the farmhouse, and his predawn antics had been waking me. As I carried the carcass into the woods, I felt terrible, and that's when I decided to try my hand at cooking the furry rodent.

Since then, I've eaten and served squirrel many times, and any dinner guest who's had enough gumption to taste a bite has loved it. If you ever get the chance, you should try it, too. Of course, it's not the sort of protein that grocery stores carry, so there's the very practical matter of needing to shoot, skin, and gut a squirrel before cooking it--a chore no one especially wants. But it's not as hard as you might think. I would go into the process here, but this isn't Garden & Gun. Instead, let's stick to the cooking part.

guts-484.jpg

Low and slow is the way to go with any rodent (groundhog, guinea pig, etc.). Because it's fall and I have a bounty of apples, I slow-cooked the meat in apple cider with a carrot, an onion, and herbs until the meat fell off the bone. Then I cooked down the sauce and used it as a glaze. The result was a high-end nod to the sort of game cooking our friends across the Atlantic are doing (and we should be doing here in the U.S.) Eating squirrel is a sustainable choice, and it's also a delicious one.


Squirrel, Cider-Braised and -Glazed

2 Tbsp. unsalted butter
1/2 medium onion, chopped
1 carrot, chopped
1 squirrel, skinned, cleaned
1 1/2 cups apple cider
1 Tbsp. Dijon mustard
1 sprig tarragon
1 bunch parsley
1 tsp. each kosher salt and freshly ground black pepper, divided
1 small shallot, finely chopped
1 Tbsp. extra-virgin olive oil
2 tsp. apple cider vinegar

Heat butter in a medium heavy pot over medium-high heat. Add onion and carrot and cook, stirring occasionally, until browned, about 6 minutes. Add squirrel, cider, Dijon mustard, tarragon, 2 parsley sprigs, and 1/2 tsp. each salt and pepper. Bring to a simmer and cover pot. Braise until meat is very tender, 2 1/2-3 hours. Let squirrel cool in braising liquid.

Once cool, remove squirrel from liquid and cut into serving pieces (hind legs, front legs, saddle). Strain braising liquid, reserving vegetables. Bring liquid to a boil and reduce, uncovered, stirring occasionally, until sauce measures 1/2 cup.

Preheat the broiler. Brush squirrel pieces with some of sauce. Broil until browned and heated through, 8-10 minutes.

Meanwhile, pick parsley leaves. Toss with shallot, oil, vinegar, and 1/2 tsp. each salt and pepper.

Serve squirrel with parsley salad, reserved vegetables, and remaining sauce.

Wednesday, November 2, 2011

Mulling Over Cider

Apples-in-tree-484.jpg

We've been planting new fruit trees--apples, pears, etc.--annually for about six years, which is about how long it can take a new tree to fruit. We keep having to plant new trees because they don't all make it. Some die in the first year from harsh weather. Some die in the second year from attacks by bark-hungry deer or root-hungry groundhogs. Of the 10 trees we planted six years ago, just one survived to maturity. It was an Asian pear tree and would have fruited this year save for the fact that my father accidentally ran it over with the tractor.

But there are two ancient apple trees that keep bringing us fruit year after year. God only knows how many young trees had to be planted for these two to survive. I'd imagine the number to be in the dozens, if not the hundreds. As it is, we've got more apples than we could ever eat, so we press some of them into cider.


Press-w-mak-310.jpgLeft: Mak with the apple press

We have an old apple press that we keep tucked in a corner of the barn. It was probably made in the 1870s, just around the time the farmhouse was built, and like many things made during that era (like the farmhouse itself), it was built to last. Can you imagine your Jack LaLanne juicer lasting 140 years?

Last weekend, my cousins came to make cider, and Makaila (who has been featured in this column before), was a star presser. She meticulously washed any dirt from the fruit, then handed it to a grown-up, who cranked it through the grinder before pressing out the juice.

We stored much of the cider in fermentation carboys, where it will rot to about 6 percent alcohol hard cider over the winter. The rest we will drink fresh, cook with, or mull with spices and some whiskey into a comforting fall treat that perfectly pairs with the cool edge to the early fall air.

knauer-cider-484.jpg

Whiskey-Mulled Cider
4-6 servings

INGREDIENTS
3 cups apple cider
1 Tbsp. dark brown sugar
3 whole cloves
2 cinnamon sticks
1/4 tsp. freshly ground nutmeg
1/2 cup whiskey, preferably Four Roses

PREPARATION
Stir together cider, sugar, cloves, cinnamon, and nutmeg in a medium saucepan. Simmer, covered, for 10 minutes. Let cider cool slightly, then stir in whiskey.

Thursday, October 13, 2011

All-Weather Farming and The Best Arugula I've Ever Tasted

biodome-484.jpg

I spent last weekend in Maine for an Indian summer last hurrah. It was an unexpectedly balmy 84 degrees and I felt disappointed that I didn't get to wear the sweaters I'd packed, but I ate some incredible food.

My first meal was dinner at the venerable Fore Street in Portland, and my first bite of salad exploded with a rich, peppery heat. I had to put my fork down and look at the plate. It was an arugula salad; what was the big deal here?

The big deal, it turned out, was the farm where the arugula came from: Laughing Stock Farm in Freeport, about 20 miles north of Portland. I sent the farmer, Lisa Turner, an e-mail to arrange a visit.

I found her packing a shipment of fall veggies in her barn. Lisa is an all-season farmer in a part of the country where farming in all seasons is a practical impossibility, or so you would think. The ground is frozen rock-hard for four months. Temperatures dip below -20! There's a good reason no one wants to visit Maine anytime after November 1 (except to ski): It's God-awful cold.


Lisa-484.jpgLisa Turner heads Laughing Stock Farms, where she grows some of the most delicious arugula I've ever tasted.

But while Lisa's farm consists of about 10 acres of land, it's also home to a small village of translucent greenhouses. And because of them, Lisa and her husband, Ralph, have been growing vegetables through the depths of harsh, unforgiving winters for the past 15 years. The couple harvest mesclun and mustard greens and that incredible arugula year-round for restaurants like Fore Street, Local Sprouts Cooperative, Street and Company, and many more, as well as their 140 CSA members.

As I walked into one of their greenhouses, I was hit with a wall of intense heat and moisture--even my camera fogged up. Each greenhouse is equipped with a tank of used restaurant fry oil that Lisa burns to keep her greens sprouting all winter. She harvests the arugula only once (instead of trimming the plant as it grows), and that technique, combined with its slow growing, must be the secret to its incredibly intense and fresh flavor.

There are other all-season farmers in Maine, too, and each has his own method. Eliot Coleman--who literally wrote the book on deep-winter farming--uses frost blankets (they're like comforters for lettuce) instead of bio-fuel, for instance.

But regardless of the technique, the lesson here is that with enough ingenuity and willpower, you can eat the freshest, local-est arugula all year long, no matter where you live.

I plan to build myself a mini greenhouse, inspired by Lisa's hearty-weather farming. With any luck, I'll be growing my own all-season greens in no time.

Arugula-Salad-484.jpg


All-Season Arugula Salad
adapted from Fore Street Restaurant, Portland, ME
4 servings

INGREDIENTS
1 cup port
1/4 cup sugar
2 tsp. kosher salt, divided
3/4 tsp. freshly ground black pepper, divided
1 medium onion
1/3 cup apple cider vinegar
4 oz. goat cheese
2 Tbsp. heavy cream
1 Tbsp. balsamic vinegar
3 Tbsp. extra-virgin olive oil
5 oz. arugula
1/2 cup hazelnuts, toasted, skins removed
6 fresh figs, quartered

PREPARATION
Bring port, sugar, 1/2 tsp. salt, and 1/2 tsp. pepper to a boil in a small heavy skillet and cook until liquid is reduced to 1/2 cup. Remove from heat and set aside to let port reduction cool.

Cut onion in half, then cut each half into thin wedges. Bring apple cider vinegar, 1 tsp. salt, and 2/3 cup water to a simmer in a small saucepan. Remove from heat and stir in onion. Let sit at room temperature until ready to use.

In a small bowl, stir together goat cheese and cream with a fork until fluffy.

Whisk 1 Tbsp. port reduction, balsamic vinegar, and oil in a large bowl. Whisk in 1/2 tsp. each salt and pepper. Toss arugula with dressing, then plate with drained onions, hazelnuts, goat cheese, and figs. Drizzle with additional port reduction.

Friday, October 7, 2011

It's The Great Cheese Pumpkin, Charlie Brown

photo-by-william-hereford.jpg
Nick Fauchald shooting (probably missing) a clay bird with a Mossberg 500 12-gauge shotgun. Adam Houghtaling is sitting on the thrower, the catapult-like contraption that hurls the clay disk into the air. Charlie, the dog waits for his turn.
Photograph by William Hereford


Last weekend we had a bit of a bro weekend at the farm. A clan of New York City food writers and photographers came down to the country for 24 hours of manliness. We drank whiskey and shot clay birds (in that order--your correspondent does not recommend you try this progression; nevertheless, it was fun). We rode the tractor and the motorcycles, chopped wood, played poker, and all in all had a respectable, testosterone-filled time.

The thing about hosting a houseful of dudes who write about food for a living is that at some point, they'll be hungry. And the food, well, it needs to be really good, but also not dainty. I was in charge of dinner and it was my task to make some top-notch fall-friendly guy food. Not as easy as you might think.

pumpkins-484.jpgPhotograph by Ian Knauer

I'll cut to the chase here and talk about the star of the dinner table: pumpkin. (But you should know that the black bear sauerbraten, while very flavorful and certainly manly, was a little tough. I've come to the conclusion that 24 hours in a vinegar marinade is too long for bear meat.)

Back to pumpkins. Now that we're fully into fall, they are everywhere (despite what you may have read about the great pumpkin shortage). They are cheap and make a majestic centerpiece for any dinner. My favorite pumpkin recipe (aside from pie) is a sort of fondue in which the squash itself acts as the cooking vessel for the cheese mixture. (There is a similar one in the October issue of BA by my friends at Canal House.)

After the seeds and pulp have been scooped out, the pumpkin is filled with layers of toasts, cheeses, and cream with broth. It's then baked until everything melts together and the squash is cooked. When you bring it to the table, there are always oohs and ahhs.

Cheese-Pumpkin-310.jpg
Photograph by William Hereford

Cheese-Stuffed Pumpkin

INGREDIENTS
1 15" length of baguette, cut into 1/2" slices (7 oz. total)
1 6-7-lb. orange pumpkin
1 3/4 tsp. kosher salt, divided
1 1/2 cups heavy cream
1 cup low-salt chicken or vegetable broth
1/2 tsp. freshly ground black pepper
1/4 tsp. cayenne pepper
8 oz. grated white cheddar
8 oz. grated Swiss cheese such as Emmenthal or Gruyere
1 Tbsp. vegetable oil plus more for pan

PREPARATION
Arrange a rack in lower third of oven and preheat to 450 degrees F.

Toast baguette slices in one layer on a baking sheet in oven until tops are browned. Set aside.

Using a sharp knife, cut a wide circle around pumpkin stem; remove top. Scrape out seeds and any loose fibers from inside pumpkin (reserve seeds for another use). Season pumpkin flesh with 3/4 tsp. salt.

Whisk together cream, broth, pepper, cayenne, and 1 tsp. salt in a medium bowl. Mix together cheeses in another bowl.

Put a layer of toasted baguette slices in bottom of pumpkin, then cover with about 1 cup cheese and about 1/2 cup cream mixture. Continue layering bread, cheese, and cream mixture, using all of cream mixture, until pumpkin is filled to within about 1/2" of opening.

Cover pumpkin with its top. Place pumpkin in a small oiled roasting pan. Brush outside of pumpkin all over with 1 Tbsp. vegetable oil. Bake until pumpkin is tender and filling is puffed, 1 1/4 - 1 1/2 hours. To serve, scoop out some of the flesh and cheesy pudding-like stuffing into each bowl.

Thursday, September 29, 2011

The Secret to Making Great Hot Sauce Even Greater

hot-sauce-recipe-ian-knauer-484.jpg

Every gardener has a muse--the inspiration that compels him or her to break out the shovel. It could be a childhood memory of a cherry tomato, warm from the sun. Maybe it's the seedy pop of a deep-ruby strawberry, or the taste of a cucumber right off the vine. Whatever it is, it's enough to make him dig up his lawn, start saving kitchen scraps for compost, and spend all his free time bent over, pulling weeds.

My muse is the chile pepper.

I save pepper seeds all winter, like some sort of fanatical collector, in little wax envelopes. I have some that a friend smuggled back from Jamaica and some from a pepper that blew smoke out of my ears when I ate it on a dare. I have Chocolate Habaneros and Louisiana cayennes and Indian ghost chiles. They all sit patiently until early spring, when I plant them in starter containers and set them on the windowsill, where they stretch their first leaves out of the dirt. Then, for the next six to seven months, nothing much happens. The plants grow at a frustratingly slow pace. It's not until late September that the fiery fruits are ripe and ready.

pepper-plants-ian-knauer-484.jpg

Well, here we are in late September, and I am rolling in capsicum. The local farmers' market is erupting with chiles, too. There are too many to eat raw or even to cook. The chile's draw is also its force field. They're spicy little buggers. There's really only one way to use up mass quantities: hot sauce.

There's an unfathomable variety of recipes for hot sauce, and finding your favorite might take some doing. But the secret that I hope you'll take away from this post has to do with aging. The last time I made hot sauce, I put the jar in the back of the fridge and forgot about it. That turned out to be a very happy accident. The sauce mellows as it ages and becomes less spicy, letting the floral notes of the chiles come forward. This isn't new. Tabasco, possibly the world's most famous hot sauce company, crafts a Family Reserve sauce that it ages for up to eight years. I don't suggest that you need to wait that long for your hot sauce to mature. Feel free to use it right away--but if you keep it tucked at the back of your fridge for a couple of months, even a year, the results will be stunning.

Hot Sauce
Makes 1 scant quart

INGREDIENTS
12 oz. fresh hot chiles, stemmed and halved
1 head of garlic, roasted*
2 1/4 cups distilled white vinegar plus more if needed
2 Tbsp. brown sugar
2 Tbsp. kosher salt

PREPARATION
Pulse chiles and roasted garlic in a food processor until finely chopped. Combine vinegar, sugar, and salt in a small pan and bring to a simmer, stirring until sugar is dissolved. Remove from heat and let cool completely. Place chile mixture in a 1-qt. mason jar, then pour vinegar mixture over. Top off with additional vinegar, if necessary (chiles should be completely covered with liquid). Cover the jar and store in the refrigerator for at least 3 months and up to 1 year. If a more refined sauce is to your liking, strain the hot sauce through a fine-mesh sieve, discarding solids, then pour sauce into a jar and chill.

* Roasting garlic is so easy, it barely requires a recipe. Anytime your oven is heated to 350-425 degrees for an hour, you have a great opportunity to roast a couple of garlic heads. Simply cut off and discard the top 1/2" of one or more heads of garlic and place the remaining heads on a small piece of foil. Drizzle with a little oil and sprinkle with a pinch of salt. Wrap the garlic in the foil and place it in a corner of the oven for 45 minutes to an hour. You can use your roasted garlic right away, squeezed out of the bulb, or refrigerate it until you need it, for up to a month.

Thursday, September 22, 2011

Zen And The Art of Beekeeping

bees-on-frame-484.jpg


I've been keeping bees since I was a teenager. That was 20-plus years ago, and still they amaze me. Of course the honey is great. I collect several gallons each September, enough to last all year. But it's the sounds the bees make that I find captivating. There's no guessing game with bees. If they are happy, you'll know. If they are upset, you'll know that, too. They are very good communicators.

In the beginning, before I learned to listen to the bees, I got stung a lot. Once, I almost died. I should have known better; I should have been listening. The bees "sing" to you or they "scream" at you, and when they scream they sound like banshees. The buzz of 80,000 angry bees' vigorously vibrating wings sounds, well, just like you'd think it would. Their pitch rises when they're upset. It sometimes gets to the point where all you can hear is bees, screaming with their wings. This pandemonium is dotted with tiny staccato pops, the punctuated landings of a thousand angry workers dive-bombing your beekeeper's veil. It can be scary. But it doesn't have to be.
front-of-hive-484.jpg
If you've ever met any beekeepers, you've probably noticed how calm they tend to be. The bees pick up on a peaceful personality. If I am calm, so are they. Some of us are naturally placid. Not me. I had to learn it. It took years.

The first trick I tried was singing to the bees as you might to a baby, in a calm, soothing tone. I didn't sing an actual song, just gibberish, but it worked. The bees stayed calm and I didn't get stung.

I didn't know it at the time, but bees don't have ears so they don't "hear" in the sense that we do. My singing only calmed me, and the bees felt my tranquility. I still sing to them. I have not been stung in more than 15 years.

This week I collected honey from the hive, and to celebrate the harvest (and National Honey Month--woot! woot!) I made this simple honey cake. It was a busy day and I had to carve out enough time to bake. With flour all over the kitchen and deadlines looming, I was feeling somewhat stressed. Mixing the ingredients, I caught myself humming a little made-up tune, just to relax. It worked in the kitchen, just as it does at the beehive.
honey-cake-484.jpg

Honey Walnut Cake
8 servings

INGREDIENTS
3/4 cup (1 1/2 sticks) unsalted butter, room temperature, plus more for pan
2 1/2 cups all-purpose flour plus more for pan
1 1/2 tsp. baking soda
1/4 tsp. kosher salt
1/3 cup sugar
2 large eggs
3/4 cup honey
1/2 tsp. vanilla
1 cup whole milk
1/2 cup walnut halves or pieces
Creme fraiche and fresh fruit for serving


PREPARATION
Arrange a rack in center of oven and preheat oven to 350F. Butter and flour a 9x9x2" baking pan.

Whisk together flour, baking soda, and salt in a medium bowl; set aside.

Using an electric mixer, beat butter and sugar in a large bowl until pale and fluffy. Add eggs one at a time, beating well, then beat in honey and vanilla. Add flour mixture and milk in alternate batches, beginning and ending with flour mixture and mixing until just combined.

Pour batter into prepared pan and smooth the top, then sprinkle with walnuts. Bake until a tester inserted into center of cake comes out clean, 45-55 minutes. Cool cake in pan on a wire rack for 1 hour. Transfer cake to a cake plate. Serve with creme fraiche and fresh fruit.

Friday, September 16, 2011

Six Pounds of Dinner Just Sitting in the Forest

hen-of-the-woods-cluster-484.jpgWait, it's a hen. In the woods. No, it's a hen of the woods mushroom!

Earlier this year, I wrote about foraging for mushrooms and its similarity to searching for love: you'll never find any if you're looking too hard. Well, I still believe that. But I also know that you'll won't even stand a chance if you don't put yourself out there. Sometimes you've just got to strap on your boots and walk through the woods.

You never know what you might find.

While it may still feel like summer to you and me--September can be so manipulative with its sunny days and piercing blue skies--the forest knows better. I can feel the changes at night. As the sun sets, a cool blanket of air gently rolls down the hill. And that, combined with all the rain we've had recently, means we are into the autumn mushroom season.


wild-chanterelle-mushroom.jpg

Yesterday, I tiptoed around hundreds of mushrooms. Some, I knew, were poisonous; others I couldn't recognize. (As a rule, I steer clear of anything I'm not 100 percent certain about.) Then I saw a scattering of chanterelles so orange they could have been drips from a late-summer sunset. Only one of them was big enough to be picked, so I left the rest to mature for a few days.

As I moved on from the chanterelles I saw a huge hen of the woods. The name is fitting, I guess; if you squint enough the mushroom looks like the full plumage of a roosting bird. Kind of. This particular cluster weighed in at about 6 pounds, but they can grow as heavy as 100. Hen of the woods is an easy mushroom to identify, and you've probably seen it and walked right past it in the woods several times. It's commonly known and sold in grocery stores by its Japanese name, maitake.

The cluster I carried home will feed me (and those who trust me) for several meals. The first will be a simple saute with a shallot and some garlic, served over soft polenta with a spoonful of creme fraiche.

If you're not an expert forager or don't have access to one for guidance, pick up a small cluster of maitake mushrooms at the grocery store and embrace the coming season with this super-satisfying dish.

polenta-with-mushrooms-ian-knauer-484.jpg

Sauteed Maitake Mushrooms with Soft Polenta and Creme Fraiche
2 servings

Note: Unless you are an experienced mushroom hunter DO NOT forage for any mushrooms without an expert guide. Contact your local mycological society for help. Have we made ourselves perfectly clear on this? Good.

INGREDIENTS
1/2 tsp. salt
1/2 cup polenta or corn grits
2 Tbsp. unsalted butter
1 shallot, thinly sliced
1 garlic clove, smashed
8 oz. hen of the woods (maitake) mushrooms
1/2 lemon
2 Tbsp. creme fraiche

PREPARATION
Bring salt and 2 cups water to a boil in a small saucepan; whisk in polenta. Boil, stirring occasionally, until soft, 20-25 minutes.

Meanwhile, melt butter in a large heavy skillet over medium-high heat. Stir in shallot and garlic and saute until just beginning to brown, about 2 minutes. Tear mushrooms into bite-size pieces and add to skillet, stirring. Cook, stirring occasionally, until mushrooms are golden, 6-8 minutes. Remove skillet from heat and squeeze lemon juice into mushroom mixture.

Divide polenta between 2 bowls. Dollop creme fraiche over each, then top with mushrooms and serve.

Thursday, September 8, 2011

My FAVORITE knife

A Custom Knife and a Tasty Slaw on the Knauer Farm

FILED UNDER:

This is the latest post in Ian Knauer's Farm to Table series. Ian will be checking in weekly throughout the season with recipes and stories from his family farm in Knauertown, PA.

cut-brooklyn-knife-484.jpgPhotograph courtesy Cut Brooklyn

Some years ago I was sitting around a picnic table drinking beer with my friend Joel. He's a knife maker who's pretty much always thinking about his craft. We started chatting about all the lumber that my grandfather, an erstwhile carpenter, had stored in the barn at the farm, scraps of which are still there: cherry, red oak, and black walnut. I asked Joel if he could make me a knife with a black-walnut handle. He thought for a moment, then said yes.

ian-knauer-walnut-wood-knife-handle.jpg

I brought Joel some scraps of the walnut and he made me the most beautiful knife I have ever cut with. He based the design on his grandmother's well-used classic kitchen knife and, with my grandfather's walnut, achieved a beautiful and classic aesthetic. The knife is a real tribute to American craftsmanship. The first time I used it was to cut through a rutabaga. As the blade slid effortlessly through the rock-hard vegetable, I made a sound that was some combination of gasp and giggle. It is still my favorite cooking tool.

Every so often I bring Joel more scraps of black walnut from the barn. About half the knives he sells these days have 40-year barn-aged Knauertown black-walnut handles.

I've learned a lot from Joel about knife care. His tips start with creating what he calls a "relationship" with your knife. Get to know its sweet spots (what the knife excels at: rock-chop, slicing, dicing, julienne, etc.) and you will use it to the fullest and begin to appreciate it for the finely tuned tool it is. It will become your best friend in the kitchen.

ian-knauer-grandma-knife.jpgGrandma's knife below; new one on top

Once you've established that relationship, caring for your knife becomes second nature. You won't throw it in the sink (or, God forbid, the dishwasher). You won't cut on a glass cutting board (which will dull it immediately). You'll slow down, nick yourself less often, and let the knife do the work.

Of course, now and then you'll want to hone it back to its original samurai-quality edge. For that, you'll need a steel.

A honing steel is the long, round metal rod that you see professional chefs glide their blades over all the time. It doesn't actually sharpen the knife, but removes little burrs as well as nicks and dings that are created by regular use. These imperfections get in the way of the cutting edge's ability to cut, and removing them is easy.

We see TV-personality "chefs" whizzing their knives back and forth over a steel at record-breaking speed. Joel suggests you slow down--a lot--and let the weight of the knife do all the work. He glides the blade once or twice over the steel in a slow motion at a 20-degree angle. That's all you need to do to hone the knife.

Okay, it's not all you need to do. Every year or so, depending on use, you will need to have your knife truly "sharpened." You can do this yourself with a whetstone, or take your knife to a pro like Joel to give it a once-over.

Your knife, when it's at its sharpest, should effortlessly slice through a sheet of paper, or anything else for that matter. And you'll have a lot of fun using it. One of my favorite uses is to make unfathomably thin slices of cabbage for my favorite slaw.

ian-knauer-cabbage-slaw.jpg

Red Cabbage Slaw with Bacon Bits and Carrots
6-8 servings

Hot bacon dressing makes everything better. Here, it helps cook the cabbage just so, taking away the raw edge. This dish is an easy way to use up a head of cabbage, and it complements almost any entree.

INGREDIENTS
1 2-lb. head of red cabbage
2 large carrots
1 jalapeno
1/4 lb. bacon, chopped
3 Tbsp. apple cider vinegar
2 Tbsp. extra-virgin olive oil
Kosher salt and freshly ground black pepper

PREPARATION
Quarter cabbage and slice crosswise, as thinly as possible, with a chef's knife. Peel carrots and cut into thin matchsticks. Thinly slice jalapeño. Combine vegetables in a large bowl.

Cook bacon in a heavy skillet over medium heat until browned and crisp, about 7 minutes. Transfer bacon to paper towels to cool. Add vinegar, oil, 1 tsp. salt, and 1/2 tsp. pepper to skillet and stir with a wooden spoon to blend, scraping up any browned bits.

Pour dressing over vegetables in bowl and toss to coat. Crumble reserved bacon and sprinkle over; toss to combine. Season to taste with salt and pepper.


Read More http://www.bonappetit.com/blogsandforums/blogs/badaily/2011/09/custom-knife-slaw-recipe-ian-k.html#ixzz1XOtpW6ST

Thursday, September 1, 2011

Irene & The Invention of The Pigloaf

roasting-pig-ian-knauer-484.jpgSetting up the spit under cover.

Every August, my cousin Leif and I roast a whole pig. We buy it from a local butcher and cook it for about nine hours over hickory that we've chopped and dried just for our annual roast. We get a keg of beer and invite everyone we know to join us. In years past we've had close to a hundred guests, and this year would have been no exception--but for a hurricane.

The impressive (and, as it turned out, justified) media buildup to last weekend's inclement weather convinced all but nine guests to stay home. I fielded a lot of phone calls from invitees wondering if the festivities were still on. Short answer: they were.

We named the pig Irene.

And the roast was as fun (and the food as delectable) as ever. Leif made German-style potato salad and a huge pot of baked beans. We ate hickory-roasted pig until our guts about burst. Then we ate some more. After a few hours, I carved the remaining meat off the animal--enough to fill a dozen large containers. The nine well-fed souls who braved the storm will be eating leftover pork for a long, long time.

But after tacos and sandwiches (and hash and chili), what does one do with another 50 pounds of leftover pig?

pig-on-spit-ian-knauer-484.jpgIrene, you did right by us.

Meatloaf recipes generally call for ground raw meat. But if you find yourself with plenty of cooked meat, it makes a great addition to the mixture. In fact, the textural counterpoint of the ground raw and the shredded cooked meats makes for an outstanding meatloaf that's reminiscent of the finest French country pâté. You can use any meat: chicken, turkey, braised beef, you name it. Just shred it and mix it with a pound of ground raw meat, some milk-soaked breadcrumbs, a couple of eggs, and some cooked vegetables. But be smart about it. Choose your accompanying ingredients based on the type of cooked meat you're using.

Let's say you're using cooked turkey; you might add ground pork to make up for the low-fat bird and dried seasoned stuffing instead of breadcrumbs--and you'd have a Thanksgivingloaf.

I wanted to make something extra special with our leftover roast pig. So instead of plain ground pork, I added bratwurst sausage meat that I'd slipped out of the casings, along with some caramelized onions and a little McCutcheon's BBQ sauce. The outcome was a cross between pulled pork BBQ and game-day smoked brats--the best of all possible pigs.

pig-loaf-ian-knauer-484.jpg

BBQ Pigloaf
6-8 servings

INGREDIENTS
1 cup freshly ground breadcrumbs
1/2 cup whole milk
2 Tbsp. rendered bacon fat or extra-virgin olive oil
3 large onions, sliced
1/2 tsp. kosher salt
1/2 tsp. freshly ground black pepper
1 garlic clove, finely chopped
2 large eggs, beaten
1/4 cup BBQ sauce, plus more for serving
1 lb. bratwurst sausage, casings removed
3 cups shredded cooked pork

PREPARATION
Soak breadcrumbs in milk.

Melt rendered fat in a large heavy skillet over medium heat. Add onions, salt, and pepper and cook, stirring occasionally, until onions are deep golden-brown, 30-40 minutes. Stir in garlic and cook until fragrant, about 2 minutes. Let onion mixture cool to warm.

Preheat oven to 375 degrees F. Work onion mixture together with breadcrumb mixture, eggs, BBQ sauce, sausage, and shredded pork. Place mixture in a 1 1/2-qt. loaf pan and bake until cooked through, 45-60 minutes. Let pigloaf cool slightly, then remove from pan and serve with additional BBQ sauce.

Thursday, August 25, 2011

Keeping It Simple. Stupid.

ian-knauer-chicken.jpg

Back in the spring, I ordered 20 chicks with the idea that I'd be eating a lot of eggs. A few died just after they arrived, which seemed normal. (If I were shipped in the mail the day I was born, I might die, too.) Then a dog killed one of them. Now I have 16 left, and for the most part they've been a real pain in the ass.

I feed them every day and give them water. I let them run through the barnyard, then lock them up at night to keep the foxes at bay. If I go anywhere, I need to line someone up to chicken-sit. It might all seem worthwhile if I were rolling in eggs, but up through last week there had been exactly zero. The chickens just weren't old enough to lay. The thought crossed my mind, more than once, to throw in the towel and have a 16-chicken BBQ.

ian-knauer-egg.jpg

Then, last weekend, I traveled to Germany to attend a friend's wedding. When I got back to the farm I was feeling slightly jet-lagged and very cranky. I opened the door to the chicken coop to let the birds out. And there, nestled in a handful of wood chips, was an egg. I caught myself smiling as I stared at it. It's amazing how something so simple can make you feel so good.

For the life of me, I couldn't settle on what to do with that first egg. I considered making a custard, maybe an omelet, maybe a souffle, but none of those felt like the right move. I phoned a friend. We talked about the egg for what might seem like a long time to anyone who hadn't spent all summer waiting for one. You can do a lot with an egg, she told me, but sometimes it's the simplest thing that's just so good.

There is no egg preparation as wonderful as a perfectly fried fresh egg with its crunchy browned edge, just-cooked white, and runny, liquid yolk. And frying an egg perfectly is not all that easy, either.

The trick is to start with a very hot pan to get the crisp edge on the white, then to reduce the heat and cover the skillet to cook the rest of the white through. Covering the skillet traps the heat inside and gently cooks the top of the egg while the bottom stays crisp. The beauty of this technique is that there's no need to flip the egg over, which is the point where I usually screw things up by breaking the yolk. Instead it stays perfectly runny.

ian-knauer-fried-egg.jpg

Sliced Tomato Salad with a Perfectly Fried Egg

1 ripe tomato
1 small shallot, finely chopped
1/2 tsp. apple cider vinegar
2 Tbsp. extra-virgin olive oil plus more for drizzling
Kosher salt and freshly ground black pepper
1 large egg

Thickly slice the tomato and put it on a plate. Sprinkle tomato with shallot, vinegar, 1 Tbsp. oil, and a pinch each of salt and pepper.

Heat remaining 1 Tbsp. oil in a cast-iron or nonstick skillet over high heat until very hot and just starting to smoke. Crack the egg into the skillet and cook until the edge is crispy, about 1 minute. Reduce heat to very low and cover skillet. Continue to cook the egg until the white is set but the yolk is still runny, about 2 minutes. Top the tomato slices with the egg and drizzle with oil. Season with salt and pepper to taste.

Wednesday, August 24, 2011

Why Bother With 57 When You Can Have Just 1

homemade-ketchup-splatter-484.jpg

Heinz is the undisputed queen of all ketchups. If the virtues that you seek in a queen are perfectly balanced delectability and a color that mirrors the reddest of supermodel lips, then she's your go-to girl. She's beautiful, efficient, tasty--and available. I'll be the first to admit that at times, she's been my go-to girl, too.

But, like many beauties, Heinz can be shallow, even a little trashy. When you ask a bottle of Heinz to describe herself and the third thing she tells you is "high fructose corn syrup," she seems a little cheap. And that's because she is.

Here's the lesson: Appreciate the appeal of Heinz Tomato Ketchup--even fool around with her once in a while--but know that for life, the ketchup you really need is one with substance and depth. You need a ketchup you'll want to see every morning over breakfast and every night at dinner. You need a ketchup you can raise your kids on.


pile-of-tomatoes-484.jpg

Ok, enough of that metaphor.

Heinz not only dominates the retail ketchup market with 60 percent of sales, it also has a strong hold on the ketchup-tomato seed market. Last spring I planted Heinz 1350 VF tomatoes in my garden, and now they are ripe and ready for picking. I spent a few hours this week restocking my pantry with enough tomato ketchup to get me through the rest of the year. Over time, I've tweaked my ketchup recipe. Its rich tomato flavor and subtle heat are lightly sweetened with brown sugar. Spices add comfort, and roasted garlic depth.

I don't need to choose just one ketchup for the rest of my days. But if I did, Heinz would find itself alone, sitting on the grocery store shelf.

ketchup-with-fries.jpg

Homemade Ketchup
Makes about 1 quart

This recipe is just the sort of inspired D.I.Y. project that promotes a good home cook to a legendary home cook. One caution: The ketchup splatters a bit as it boils and reduces, but, as you'll see, the outcome is well worth the mess and the time involved. This ketchup is one you can feel really good about eating. It is wholesome, substantial, and (most important) delicious.

INGREDIENTS
1 tsp. coriander seed
1 tsp. cumin seed
1 tsp. mustard seed
1 bay leaf, broken into pieces
2 Tbsp. extra-virgin olive oil
1 large onion, chopped
5 lb. ripe sauce tomatoes; such as Roma, San Marzano, Heinz 1350 VF
1 cup red wine vinegar or apple cider vinegar
1/2 cup dark brown sugar
1 head of garlic, roasted
1/4 cup capers with brine
1/4 cup hot sauce
2 Tbsp. soy sauce
2 Tbsp. Worcestershire sauce
1 tsp. paprika
1/2 tsp. cinnamon
1/2 tsp. allspice
2 tsp. kosher salt
1/2 tsp. black pepper

PREPARATION
Toast the coriander, cumin, and mustard seeds in a dry skillet over medium heat until they are several shades darker and very fragrant. Finely grind the seeds with the bay leaf in a spice mill.

Heat the oil in a large heavy pot over medium-high heat until it shimmers. Add the onion and cook until well browned; this will take about 10 minutes. Add the remaining ingredients, including the ground, toasted spices. Bring to a simmer and cook over low heat, stirring occasionally, until the vegetables have broken down. This will take about 45 minutes. Puree the ketchup in a blender or food processor, then return it to the pot. Return ketchup to a simmer and continue to cook until it reaches a pastelike consistency. This will take 1 1/2-2 more hours. Toward the end of cooking, stir the ketchup more frequently to prevent scorching. Season the ketchup with salt to taste.

Place ketchup in sterilized canning jars while still hot, then cap jars and process in boiling water for 10 minutes. Let the jars cool at room temperature until they seal.

Thursday, August 11, 2011

Mak & the Chip Attack

adorable-child-ian-knauer-484.jpg

My cousin Makaila is a girl of action. She has two speeds: fast and fierce. If she's not steering her little car at top speed down the steep drive of the farm lane or sprinting after chickens, then she's up to her elbows in dirt. Makaila is two years old, and by the time she's 22 she'll be a force of nature. It almost frightens me to think about it.

Around the farm, we all do our part to keep her out of trouble. That's the job I was engaged in back in April when she and I planted Yukon and red bliss potatoes. It was fun at first; we cut eyes from old potatoes and placed them in the dirt. Each chunk of spud would become its own plant. Eventually, however, Makaila got bored and focused on convincing her father, Leif, to take her on a tractor ride. A few minutes later Leif was firing up the old Ford 8N. Makaila can be very persuasive.


potatoes-in-ground-ian-knauer-484.jpg

The potatoes we planted sprouted, green and enthusiastic, up and out of the earth over the past few months. Then, a few weeks ago, the greens started to yellow and brown in the heat of summer. Now they've all but died away. That means it's time to dig up what's below. Potatoes are one of the most rewarding harvests in the garden. In fact, digging them up feels a little like Christmas. There's no telling exactly how many potatoes will emerge from the ground as you heave soil with a spade, each shovelful of dirt bringing more spuds to light.

Freshly harvested potatoes need one to two weeks to dry and form their skin or "cure". It's important to keep them in a dark place as this happens. If you don't, they will absorb the sunlight and create chlorophyll, which is what has happened to potatoes that have green skin.

Makaila is due for a farm visit soon, and I want her potatoes to be ready when she gets here. I'll dig up some Yukons and place them in the cool cellar of the farmhouse for at least a week. Then, just before we're ready to grill our hot dogs for lunch, I'll slice them paper thin and fry them into chips. Whether you're two, 32, or 92, the absolute best topping for any grilled dog is crumbled potato chips.


potato-chips-ian-knauer-484.jpg

Potato Chips
Makes about 8 cups

4-6 Yukon or russet potatoes (about 2 lb.)
4 cups (approx.) vegetable oil (for frying)
Fine sea salt

Wash the potatoes and put them in a bowl of cold water to cover. Pat 1 potato dry. Using a V-slicer or mandoline, cut the potato into paper-thin slices (about 1/16" thick) and let the slices stand 5 minutes in another bowl of cold water to cover.

Drain the potato slices and spread them without overlapping on layers of paper towels. Blot the slices completely dry with another layer of paper towels.

Heat the oil in a 3- 4-quart pot until a deep-fry thermometer registers 375 degrees F. Working in batches of 8 to 10 slices, fry the potatoes, turning once or twice, until golden, 1 1/2-2 minutes, making sure the oil returns to 375 degrees F before adding the next batch. As chips are fried, transfer with a large slotted spoon to paper towels to drain; sprinkle with salt. Cut and fry remaining potatoes in the same manner.

Thursday, August 4, 2011

Hopped Up!

hops-ian-knauer.jpg

If you haven't brewed your own beer, I bet you know someone who has. Thanks to the craft-brewing boom of the past 20 years, just about everyone has access to great microbrews--even people who have no interest in making them. But I'm the kind of guy who likes making things, so a few years ago I ordered some hop plants to use in my home brew.

The hops grew so quickly and vigorously that I could barely keep up with the trimming and training they require (like ivy, they are climbers and are usually grown on twine or wire). The literature I received with the cuttings warned me not to expect any hops the first year. I ended up with about a gallon of them anyway.


ian-knauer-hops-shoots.jpg

If you've got rich soil and lots of sun, you will find that hops are incredibly easy to grow, and if you have a few square feet of dirt in your backyard I recommend you plant some next spring--even if you don't plan on making beer (more on that later). Here are some tips:

* You'll need to plant rhizomes instead of seeds because the plants are either male or female. Only the female plant produces the flowers, which are the actual hops. (If this sounds familiar to some of you, it may be because hops are part of the botanical family Cannabaceae; so is marijuana.) Like the other members of that family, hops contain complex (and volatile) chemical compounds. Some of these, like dimethylvinyl carbinol, may have a calming effect on the human nervous system. They may relax you. Of course, alcohol also has this effect. That's why when you drink too much beer, you get sleepy.

* Order your hops so they'll arrive in the spring, after the chance of frost has gone. Form a small hill for each rhizome. Plant with the buds pointing up, and cover with an inch of loose soil. The hills should be spaced at least three feet apart if the hops are of the same variety and five feet apart if they are different. Mulch well. Within two to four weeks you'll start to see hop shoots rise up out of the ground.

* Stake a length of twine on each hill, securing the top to a building, fence, or pole, and when young vines are about a foot long, wrap them around the twine in a clockwise direction. They will grow. And grow. And if you're lucky, you'll get some hops that first year. Cut them down to nothing in the fall. Prune the weaker vines after they sprout again the following spring.

As I said, hops aren't just for beer. The shoots that corkscrew up out of the ground in the spring are quite tender and can be sauteed like asparagus. And the hop flowers themselves add a sharp, bitter herbal punch to anything they touch. Some forward-thinking chefs, like Pat Combs at the Paws Up resort in Montana, have even been cooking with hops. Combs stuffs hop leaves with hop flower petals, cheeses, and aromatics before tempura-frying them to make a cheesy-herbal beggar's purse. In a review of the dish, one writer claimed they were so delicious that she would have forgone all other food that evening in exchange for more of the crisp-fried hop purses.

The recent heat waves have left me feeling a little lazy compared with Chef Combs. I'll keep his recipe tucked away for some cooler weather. Instead, this week I'm folding my plant's flowers into a hopped-up bruschetta made with the garden's first tomatoes.

hops-bruschetta-ian-knauer.jpg

Hopped-Up Bruschetta
3-4 servings

If you have trouble finding fresh hops, basil flowers make a worthy substitute. Once the basil plant has gone to flower, its pungency increases and its herbaceousness becomes slightly bitter and hoplike.

INGREDIENTS
1/2 small garlic clove
Kosher salt
1 large tomato, chopped
1/2 small onion, sliced
2 Tbsp. extra-virgin olive oil
2-3 fresh hop flowers (not pellets) or basil flowers, torn
1/4 tsp. freshly ground black pepper
6-8 pieces toasted country bread

PREPARATION
Mince and mash the garlic to a paste with a pinch of salt. Combine garlic paste with 1/2 tsp. salt, the tomato, onion, oil, hop flowers, and pepper. Top the toasts with the tomato mixture and serve.

Thursday, July 28, 2011

On Effin Rabbits and Reproducing Sorrel

wild-sorrel.jpgWild sorrel spreading like...wild sorrel

It's almost August, and I find it hard to believe how quickly the summer is passing. By now, there have been some resounding successes in the garden. The radishes bubbled up out of the ground like Champagne fizz; the zucchini continues to reproduce like rabbits.

But there have been some utter failures, too.

The rabbits have also been reproducing like rabbits. Every time I walk into the beet and Swiss chard patch, two of them scamper out through the fence. Now that no beets are left, I thought they'd have moved on to the lettuce. For obvious reasons, it is my great hope to bring you a rabbit recipe in the coming weeks.

Luckily, there's one section of the garden that the rabbits steer clear of: the herbs. None of them munch on the rosemary; it's the size of a small bush by now. There's a basil plant that thinks it's an oak tree. The sage and thyme have tripled in size since I placed them, toddler-size, in the ground.

Many of my herbs are grown from the same plants year to year, even though it gets too cold in the winter for them to stay in the ground. Each fall, I dig them up, cut them into smaller versions of themselves, and replant them in an indoor window box; they live there until the following spring, when I move them back to the garden to spread their roots.

And I use herbs a lot in my cooking. I blend them with salad greens, I call on them to accent sauces, I use them to flavor just about everything. This is where I could give you a recipe for pesto using, like, four different kinds of basil. Or for a Martini infused with rosemary and thyme. But you've already seen something like that, I'm sure. Instead, let's talk about sorrel. No one knows what to do with sorrel, and it has been creeping its way into American food one farmers' market at a time.

I planted sorrel once, years ago, and have never had to since. By now, it has moved beyond the garden fence and into the yard. When the grass is mowed, the air is filled with a fresh, citrusy scent. The herb has a subtle lemony flavor, and because it's a green, it often shows up in salads. But I like to use it the way you might use citrus fruit in a bright dessert.

There's just enough gelatin in these panna cottas to hold their shape; the result is a creamy, lemony-herbal pudding that just melts away when you eat it. I serve the panna cottas topped with berries or lightly sweetened whipped cream.

sorrel-panna-cotta.jpg

Sorrel-Buttermilk Panna Cottas
8 servings

Vegetable oil (for ramekins)
2 1/4 tsp. unflavored gelatin
6 cups sorrel
1 1/2 cups buttermilk
1 1/2 cups heavy cream
2/3 cup sugar
Pinch of kosher salt

Lightly oil eight 3- to 4-oz. ramekins.

Sprinkle gelatin over 2 Tbsp. cold water in a small bowl and let stand 1 minute to soften.

Puree sorrel and buttermilk in a blender until very smooth, about 1 minute. Pour mixture through a fine-mesh strainer set over a medium bowl, pressing on solids. Discard the solids.

Heat cream, sugar, and a pinch of kosher salt in a small heavy saucepan over medium heat, stirring until the sugar dissolves. Add gelatin mixture; stir until it dissolves. Pour cream mixture into buttermilk mixture, stir to combine, and divide equally among ramekins. Let cool completely, then cover ramekins with plastic wrap and refrigerate the panna cottas until they are set, at least 4 hours. Serve with lightly sweetened whipped cream, if desired.

Thursday, July 21, 2011

Dr. Zucchini, I presume...

ian-knauer-shaved-zucchini.jpg

My sister Cecily recently earned her doctorate in anthropology. For years, the quest had consumed her. It began with a thought, a notion, which she planted and then nurtured. She worked hard for a long, long time and now, finally, she is where she wanted to be. And I'll bet she's tired of answering the question of what comes next. Yes, she wants to use her degree for something good, but what that will be, well, she's not quite sure yet.

With her newly minted "doctor" status, I think Cecily may find my comparison of her Ph.D. to the zucchini in my garden to be kind of silly.


ian-knauer-zucchini-plant.jpg

But I can remember back in early May when I sowed squash seeds in perfect rows. I was so full of hope that they would take and that I'd have enough zucchini to feed my family. I watered and weeded the plants as they grew and reached toward the sun. I worked with them for what seemed like a long time, and now here I am with so much goddamn zucchini I don't know what I'll do with it.

(I'm not alone; a local farm is practically giving it away. Their vegetable stand offers three squash for a dollar and each squash weighs at least 2 1/2 pounds. That's about 13 cents a pound. Worms cost more.)

So here I am, exactly where I wanted to be--swimming in zucchini--and I'm running out of ideas for ways to use it. I've been eating it raw and shaved as a salad. I've pickled it, fried it, grilled it, and roasted it. Still, I've got a lot of zucchini to get through. So when Dr. C came down to the farm last weekend, I asked what she wanted for lunch. Answer: pizza. So I figured now that we've earned our zucchini, here's what we're going to do with it:

ian-knauer-zucchini-pizza.jpg

Zucchini Pizza
4-6 servings

INGREDIENTS
2 lb. zucchini
2 tsp. kosher salt plus more for seasoning
1 1/2 lb. pizza dough
1/4 cup extra-virgin olive oil plus more for pan and dough
1/2 cup grated Parmigiano-Reggiano
1 garlic clove, finely chopped
1 hot chile, finely chopped
Freshly ground black pepper

PREPARATION
Trim zucchini and thinly slice crosswise using a mandoline or a very sharp knife. Toss zucchini in a bowl with 2 tsp. kosher salt and transfer to a strainer set over a bowl; let sit at room temperature for 30 minutes. Rinse the zucchini, then squeeze to remove as much liquid as possible.

Preheat oven to 450 degrees. Oil a 12x17" baking sheet. Rub surface of dough with oil. Stretch dough to form a 12x17" rectangle, filling the baking sheet.

Sprinkle half of cheese evenly over dough. Scatter zucchini, garlic, and chile evenly on top. Sprinkle evenly with remaining cheese, season with salt and pepper, and drizzle with 1/4 cup oil.

Bake pizza until the underside is well browned and the dough is cooked through, 12-16 minutes.

Thursday, July 14, 2011

Hi There: I Like to Party...

wineberries-picking-ian-knauer.jpg

I come from a big family. On one side, I am the oldest of 24 cousins. Fortunately, everyone takes a turn pouring sweat into the farm. Christy scraped hundred-year-old wallpaper from the hallway a few weeks back. Ryan planted a fig tree in the barnyard. Leif came up last weekend to line the driveway with boulders that will help prevent erosion. That's the sort of work Leif likes--the hard kind that involves loading and unloading heavy things into and out of a pickup truck. The kind that makes you feel like you deserve a beer or four. Did I mention that in addition to hard work, Leif also likes to party? So it was no surprise that we spent Saturday night soothing our sore muscles with hopped-up suds.

Come Sunday morning, we needed a little pick-me-up: a dose of natural sugar to get our blood running again. Fruit sounded good, so we drove the truck up to the top of the hill where, along the tree line, we found hundreds of wineberries.

Wineberries grow in the woods and along the roads near our farm--and pretty much everywhere else in the Northeast. A wild relative of the raspberry and originally from northern Asia, the wineberry (Rubus phoenicolasius) was introduced in this country to breed hybrid raspberries, but it escaped captivity and took very well to the climate and soil here. Some people (probably the same folks who call dandelions "weeds") say that it's an invasive species that has taken over the woods. I call it a treat. The berries, which look like polished rubies and taste like raspberry wine, ripen during June and July.


foraging-for-winerberries.jpg

Leif and I spent an hour picking and ended up with quarts of berries, some of which we ate for breakfast. We were left with plenty more. "You know what these will go well with?" I asked after breakfast. "Yeah," said Leif, "vodka."

So I decided to make a wineberry cordial.

Fruit cordials are impossibly easy to make and they're a fun way to preserve seasonal fruit. Just pick your favorite (I love any berry); make sure it's perfectly ripe and unblemished; pour vodka over it, and let it sit for a few weeks; strain and sweeten. The elixir you end up with is packed with flavor. I serve cordials after dinner, or before dinner with a splash of soda water over ice.

In addition to the "use the best fruit you can find" rule, it's also important to use good-quality vodka. Luckily for Leif and me, some of the world's best, Boyd & Blair is made right here in Pennsylvania using locally grown potatoes.


wineberry-cordial-ian-knauer.jpg

Wineberry Cordial
Makes about 1 quart

The alcohol macerates the berries, sucking out all their flavors; a little sugar syrup added at the end seals the deal. All fall and winter I serve the sweet taste of midsummer to only my most important guests. If you live in an area where there are no wineberries, use raspberries instead.

INGREDIENTS
2 1/2 cups wineberries
3 cups vodka
1/2 cup sugar
1/2 cup water

PREPARATION
Place wineberries in a sterilized glass quart container with a lid. Muddle the berries with a muddler or the handle of a wooden spoon until they are all smashed. Add vodka to the container, filling to the top. Cover the container and place in the refrigerator or a cool, dark place for 3 weeks.

Strain the cordial through a fine-mesh sieve. Discard solids.

Bring sugar and water to a boil, stirring. Add sugar syrup to the cordial, a little at a time, until cordial is sweetened to your liking. (You'll want to use at least half of the sugar syrup.) Return cordial to container and store covered at room temperature.