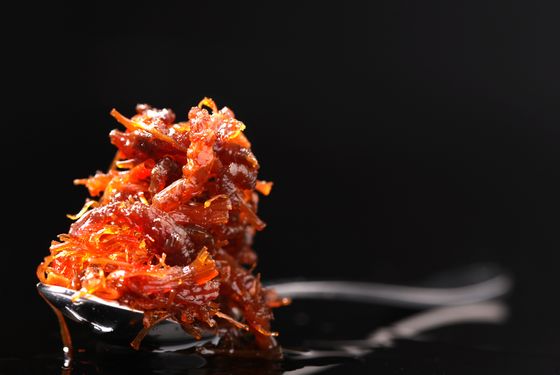
It's been called "the caviar of the East."Photo: Melissa Hom
The idea behind most of the items featured in this column is that they're secret ingredients: You
put a little Maggi in a salad dressing to covertly pump up the flavor of the salad, not to make it taste like Maggi. You add
a few dashes of Angostura bitters to a stew because it accentuates the beef, not because it makes the stew taste like a Manhattan. You want to make the food better, not to show off the ingredients. But XO sauce is different. It's got class; it's got panache. It's a sauce with credentials and you want to put it on display.
XO sauce was first created in Hong Kong — at either the Peninsula’s Spring Moon restaurant or at one of the many totally awesome fish restaurants in Kowloon — sometime in the early eighties. In China, as in every Jay-Z song, cognac is a status symbol, and the sauce was named in order to leverage the prestige and panache associated with "XO," the esteemed cognac designation. There's no actual cognac, or brandy of any kind, in XO sauce — but its off-the-charts-expensive ingredient list means it
is fairly pricey ($15 for a few ounces) and, more important for our purposes, absolutely packed with deep, rich, smoky intensity. In fact,
Vogue China
once called it the "caviar of the East." The sauce is primarily a chunky combination of dried seafood and Chinese ham (though store-bought brands might omit the ham): Dried scallops can easily cost $100 per pound in the U.S., and a layperson in America would have to smuggle a good Yunnan ham.
In other words, even though there's no cognac in XO, it is still fancy stuff. And American chefs have taken to it: At the New York location of
Hakkasan, a plate of stir-fried dover sole with XO will run you $46. (A whole Peking duck with XO and Chinese caviar will set you back $295.) David Chang's
Ssäm Bardresses up market greens with XO. At
Momofuku Ko, Chang's team serves XO with duck heart and tofu. In Chicago right now,
Alinea serves grilled razor clam with a dose of homemade XO.
You can buy decent XO sauce in any Chinatown (or
online), and it's worth the cost. But if you're going all the way to Chinatown anyway, the better option is to buy the necessary ingredients and make your own — get the highest quality dried scallops you can find, and use good prosciutto or speck in place of the Yunnan ham (unless, of course, you have some secret source smuggling the real thing in for you).
Whether you buy it or make it, you can treat XO like a sort of super-powered soy sauce: In the recipes below, the sauce amps up pan-fried eggplant and grilled steak, but you can even just toss something simple like roasted broccoli in a teaspoon of XO. Plus, it keeps basically forever so you'll always have some on hand in case dinner needs a dash of class.
Homemade XO Sauce
Makes about 2 cups
2 oz dried scallops
2 oz dried shrimp
water
3 oz Yunnan ham or proscuitto
1 1/2 cups vegetable oil
2 heads garlic, peeled
1/2 cup chopped, peeled ginger
15 dried whole red chiles or 1 tablespoon dried red chile flakes
1/2 teaspoon fine sea salt
1/4 teaspoon sugar
Place scallops and shrimp in a bowl and cover with water. Let soak overnight, then drain.
Pulse ham in a food processor until finely chopped. Heat 1 cup oil in a large heavy skillet over medium high heat until hot, then stir in ham and cook, stirring occasionally, until ham is browned, about 4 minutes.
Pulse drained scallops and shrimp along with garlic, ginger, and shallots in food processor until finely chopped, then add to skillet.
Finely grind chiles in a spice mill, then add to skillet with salt and sugar. Cook XO sauce, stirring frequently, until browned, about 15 minutes. Transfer to a container and add remaining 1/2 cup oil. Keep refrigerated.
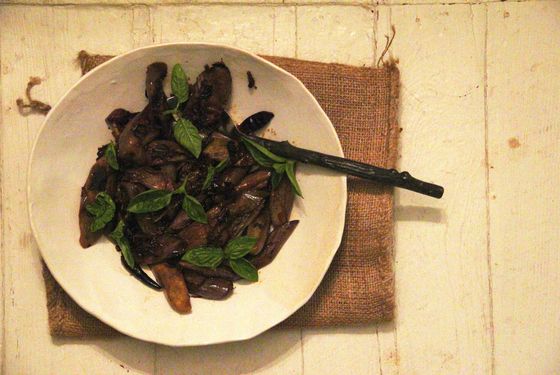
You've never had fancier eggplant.Photo: Ian Knauer
XO Eggplant
Serves 4
2 tablespoons vegetable oil
1 small onion, sliced
2 lbs Chinese or Japanese eggplant, cut into 2-inch pieces
5 whole dried chiles
2 tablespoons soy sauce
1 tablespoon rice wine vinegar
1 tablespoons brown sugar
1 tablespoon sesame oil
1 tablespoon XO sauce
fine sea salt
freshly ground black pepper
Fresh basil leaves
Heat oil in a large heavy skillet over high heat until hot. Add onion and cook, stirring, until browned, about 5 minutes. Add eggplant and chiles and cook, stirring frequently, until eggplant is browned in places, about 6 minutes. Stir in soy, vinegar, sesame oil, XO, salt, and pepper, then cover skillet and lower heat to medium. Let eggplant cook until tender and sauce is absorbed, about 5 minutes. Transfer eggplant to a serving platter and garnish with basil leaves.
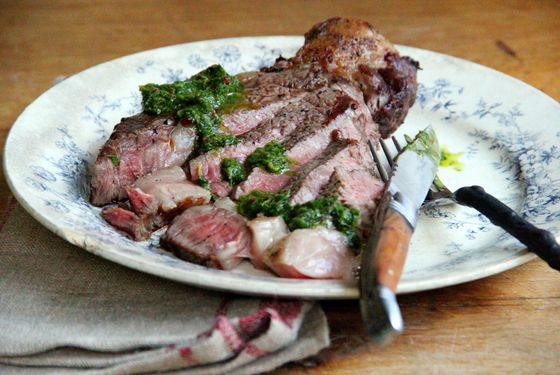
This sauce packs an absolute ton of flavor.Photo: Ian Knauer
Grilled Steak with XO Chimichurri
Serves 4
1 cup flat-leaf parsley leaves
1 cup cilantro
2/3 cup extra-virgin olive oil
3 tablespoons XO sauce
1 teaspoon dried red chile flakes
2 teaspoons fine sea salt
1 teaspoon freshly ground black pepper
2 (1 lb) rib eye steaks
Finely chop parsley and cilantro then stir herbs together with oil, XO, chile flakes, 1 teaspoon salt and 1/2 teaspoon pepper.
Preheat grill.
Season steaks with remaining 1 teaspoon salt and 1/2 teaspoon pepper, then grill, turning occasionally, 6 to 8 minutes total for medium rare. Let steak rest 10 minutes then slice and serve with XO chimichurri.