
Saturday, May 21, 2011

Smells Like Spring...Garlic

This post can also be read on bonappetit.com
ian-knauer-spring-garlic-garden-h.jpg

There is a moment each spring when I find myself standing in the garden, just staring at the garlic. It's a moment I dread because it means it's thinning time. Thinning requires decision making, and when I'm forced to make decisions--in the garden and in life--I often fear that I'll make the wrong one. So I just stand there for a while, feeling the cool spring air on the back of my neck, and stare at the too-thick rows of garlic. I know I'll have to pull some of it out of the ground so the rest will have enough space to grow. It's a sacrifice for the common good. It's just hard to be the druidic executioner, so to speak, and choose who will live and who won't.

I plant garlic every fall. It sprouts an inch or two before winter, then sits, waiting for early spring, when it skyrockets, sending forth foot-tall shoots and leaves. In another month it will send up flower stalks, or scapes, which I'll remove so the bulbs will have all the energy they need to plump up into heady garlic. But before that happens, I'll have to pull out some of the weaklings, giving the hardier stalks space to grow.

ian-knauer-spring-garlic-h.jpg

This practice isn't limited to small family farms like mine. Garlic farmers with plots much larger than mine also thin their plants. And for those of you who aren't faced with the heart-wrenching task of deciding which stalks to pull, that's good news. You can often find spring garlic at farmers' markets, and as you might imagine, it's pretty good stuff.

Spring garlic has the sharp flavor of aged garlic (the garlic you buy in the store has been hung and aged for some time, extending its shelf life and producing that papery skin on the outside), but it lacks the muskiness and bite that generally come with garlic that's not right out of the ground. Its cologne fills your head. And remembering that aroma makes the need to pull some of the stalks out easier for me. Much easier, in fact, because roast chicken with spring garlic and butter under the skin is a real treat that's around for only a couple of weeks each year.

Here's a recipe for that spring garlic-heavy roast chicken. I'd say it's worth sacrificing the lives of several of these little lilies.

ian-knauer-roast-chicken-h.jpgPhotos by Ian Knauer

Spring Garlic Roast Chicken
Serves 4

1 3 1/2-lb. whole chicken
2 stalks spring garlic
3 Tbsp. unsalted butter, room temperature
1 lemon, halved
1 3/4 tsp. kosher salt
1 1/2 tsp. freshly ground black pepper

Position a rack in middle of oven and preheat to 450 degrees F.

Rinse the chicken and pat it dry. Beginning at the large cavity and being careful not to tear the skin, gently run your fingers between the skin and the meat to loosen the skin.

Remove any tough leaves from garlic, then finely chop the pale-green and white parts. Stir together garlic with butter, 1 tsp. salt, and 3/4 tsp. pepper.

Push garlic butter under chicken skin, including around the thighs and drumsticks; massage skin from the outside to spread butter evenly.

Season chicken inside and out with 3/4 tsp. each salt and pepper. Place lemon halves in the cavity and loosely tie the legs together with kitchen twine. Place chicken in a roasting pan on its side (one wing up; you may need to lean the chicken against the side of the pan) and roast 15 minutes. Turn chicken over to the other side and roast 15 minutes more. Turn the chicken onto its back and continue to roast until skin is golden and has begun to pull away from the base of the drumsticks. This will take about another 20-25 minutes. Transfer chicken to a cutting board and let rest 15 minutes before carving.

Thursday, May 19, 2011

Looking For A Legacy? Here's An Easy One: Rhubarb

This post can also be read on bonappetit.com
ian-knauer-spring-484.jpg

It has finally happened. Spring, that is. Farmstands in my area of Pennsylvania are teeming with ramps and asparagus and chives, all of which I've been cooking daily. It feels so right to eat something other than root vegetables. (Nothing against turnips, but a little green is very welcome after the winter we had.)

I've been eating a lot of rhubarb, too. One of those practically care-free plants, it shoots up pretty pink stalks every spring and, like my watercress, just keeps on giving, year after year. In fact, given its ease of cultivation, it's a wonder that only one bunch of it is planted here on the farm.

Yesterday morning, as I spread rhubarb compote over freshly baked biscuits, I decided to change that. I took a ride to the local Agway and bought eight rhubarb crowns for $1.50 each. Twelve bucks is a small price to pay for a lifetime of rhubarb. And if these plants take, it's likely they'll outlast me. (The one plant that's growing here has outlasted the man who placed it in the ground, my grandfather.)

ian-knauer-rhubarb-roots-484.jpg

Rhubarb crowns aren't much to look at. They come in a little plastic bag and are packed in sawdust. Chances are they've been sitting around for a while, so the first thing I like to do is give them a good soak in water for several hours. Then I grab a shovel and pick a spot that will get lots of sun but be out of the way. You should put some thought into picking that spot. It will be your rhubarb patch from now on.

Some folks like to fertilize or add compost to their rhubarb, and it can't hurt. But it's not necessary. Rhubarb wants to live, and it will send its roots as far down into the soil as it needs to find food. To plant, loosen the soil about 10 inches down, place the crowns in the ground at a depth of two inches, and cover them up with soil. Then wait. Next year, you'll have rhubarb (though you should go easy on the first harvest). And your grandkids will have rhubarb, too. Even if you're not around to see it.

ian-knauer-biscuit-484.jpgPhotographs by Ian Knauer

Here's an easy way to make a quick rhubarb compote. I eat it for breakfast on biscuits and for dessert with vanilla ice cream.

Rhubarb Compote
Makes about 1 1/4 cups Be sure to trim the leaves from your rhubarb stalks (and don't eat the roots). They contain a high concentration of oxalic acid, which is poisonous.


1 lb. rhubarb stalks, cut into 1/2"pieces
3/4 cup sugar
Kosher salt
1 tsp. vanilla

Bring rhubarb, sugar, a pinch of salt, and 2 Tbsp. water to a boil in a small heavy saucepan. Lower heat and cook, stirring often, until rhubarb has broken down and sauce is thickened, 10-12 minutes. Remove from heat and stir in vanilla. Let cool to room temperature.

Thursday, May 5, 2011

A Gift From My Great, Great, Great, Great Someone

This post can also be read on bonappetit.com
ian-knauer-tilling.jpg

I spent the better part of yesterday tilling winter rye into the garden. It's fragrant stuff. Not in a great way, either, but in a wheatgrass-juice way. In fact, I find it to be a little nauseating.

As the rye decays into the cool spring soil, it adds nitrogen and other beneficial elements that will help this summer's vegetables thrive. One of the local farmers calls the practice of turning young rye grass into the earth adding "green manure." Given the way it smells, I can see why.

The process requires some foresight. I sowed the rye last October. Now that the garden has been tilled, the ground there is a stark and empty contrast to the rest of the farm, which has (finally) taken on the most brilliant shades of pale green. Aside from the garlic and onions I planted last fall (again, foresight required), the garden is barren.

Luckily, there's a source of edible greens that will fill in the salad gap until the garden is ready. This was the well-thought-out work of my ancestors.


watercress-2.jpg

Every year, sometime around early April, watercress starts to pop up in a little spring that feeds into the pond. It grows slowly at first, but then kicks into full gear by the beginning of May. This week, there's so much of it that I could eat watercress for every meal and still not make a dent in the patch. Someone, generations ago, planted it; since then it's been flourishing in the same spot. My father tells me stories of its bounty. My grandfather told the same stories, as his grandfather did. In fact, no one in the family knows exactly when it was planted. A long time ago, for sure.

And it requires zero care. No need to add green manure (or any other kind) to the plot. No need for weeding or tilling or cultivating in any way. It's a gift from well over a hundred years ago, and it's still just as wonderful. Now that is foresight.

Watercress is an exceptionally peppery and crisp green and, of course, it's terrific in salads. But now that there's a ton of it, I like to cook it and serve it alongside roast chicken.

Here's a recipe for Creamed Watercress that uses the starch from a cooked potato for thickener. I add a little mascarpone cheese to round out the richness, but even without the dairy, this is a great version of poor man's creamed spinach.


watercress-process-h.jpgPhotos by Ian Knauer

Creamed Watercress
Serves 4-6

1/2 medium waxy potato, peeled

1 Tbsp. plus 1/2 tsp. kosher salt, divided
1 1/2 lb. watercress
2 Tbsp. unsalted butter
1/4 cup mascarpone
Freshly ground black pepper

Cut potato into 1/2" pieces. Cover potato with water in a medium pot; add 1 Tbsp. salt. Bring water to a boil and cook until potato is very tender, 15-20 minutes. Remove potato with a slotted spoon and transfer to a food processor. Bring the water back to a boil and add the watercress. Blanch watercress until it's bright green, about 1 minute. Transfer watercress to a colander and press on it to remove as much liquid as possible, then add it and the butter, mascarpone, and 1/2 tsp. each of salt and pepper to the processor. Puree with the potato. Season to taste with salt and pepper.


Thursday, April 28, 2011

For Morels and Love - Spring Rites

This post can also be found on bonapetit.com


morel-h.jpg

I've been trying to practice being patient. It's not something I'm particularly
drawn to or good at. That's why I love to cook. Cooking delivers immediate
gratification. You can start with a few ingredients, and in no time you've made
something delicious, or at least edible. I find real pleasure in its immediacy.
Still, I've come to believe that some really great things are worth waiting for.


When the sun came out this afternoon after hours of rain, I decided to take a break from my farm chores and walk through the woods to look for morels. These elusive mushrooms are difficult to spot. They blend in with the forest floor and are scattered seemingly at random. Finding them requires a lot of patience. I probably walked past a hundred, never noticing one.

Their scarcity is even reflected in the phrases mycologists use. You forage for mushrooms. You hunt for morels.

About an hour into my wooded walk I started thinking that hunting for morels is a lot like trying to fall in love. In both, it's the idea of finding exactly what we are looking for that drives us. It's the hope that we'll find what will make us happy. And that really requires a lot of patience. As for the morels, well, the conditions have been perfect, I kept telling myself: a lot of rain and unseasonably warm days. But still--nothing. You never find morels when you're looking for them.

Just when I was about to give up and turn back toward the farmhouse, I saw, right in front of me, one perfect, beautiful morel. I took her picture and put the mushroom in a paper bag. Then I left the woods. When you finally find what you've been looking for, you should stop looking.

Back home, I made a snack: a small piece of toast topped with the mushroom (which I'd sautéed with shallot in a little butter), sprinkled with chives. Tomorrow, I might walk through the woods again, but I won't be hunting for morels. I'll just wait until they find me.

morel-on-toast-h.jpgPhotos by Ian Knauer

If you find only one morel, make it count. Here's a simple yet delicious way to do just that:

Morel on Toast

Serves 1 as a snack
Note: Unless you are an experienced mushroom hunter DO NOT forage for morels without an expert guide. Contact your local mycological society for help.

1 Tbsp. unsalted butter

1 small piece bread

1 tsp. finely chopped shallot

1 morel, halved lengthwise

Kosher salt

Finely chopped chives

Melt butter in a small skillet over medium heat, then fry bread on both sides until crisp, about 2 minutes. Remove the toast, add shallot and morel to the skillet, and season to taste with salt. Cook, stirring, until the mushroom has softened and the shallot is browned, 2-3 minutes. Serve the mushroom on toast, garnished with chives.

Thursday, April 21, 2011

The Chicks Have Arrived - OR - All The Ladies in the House (the ladies...the ladies...the ladies!!!!)

(THis post can also be read at Bonappetit.com)

ian-knauer-chicks-484.jpg

I got a voicemail from the post office first thing Monday
morning.

"Uhh, hi, Mr. Knauer, uhh... [long pause] ...your chicks are
here..."

Great, I thought, just in time for Easter.

A few months ago I was cleaning out a section of the barn
that no one had set foot in for generations. Digging around,
I found a wooden cage tucked in the corner. The cage was
wrapped with chicken wire and was clearly designed to
raise baby chicks. I was inspired. Fortunately, there is
also an old chicken coop on the farm--a building built
precisely for raising chickens, something that no one in
my family has done for 50 years.

It also happens that I eat a lot of eggs. I have them most
mornings for breakfast. I eat them for lunch, which this
time of year means hard-boiled and crumbled over
asparagus. I fry them and place them on top of pizza
for dinner.

Given these facts, raising hens seemed like an easy thing
to justify. I went online and ordered 20 laying hen
chicks of various breeds for about $2 each. And when I
picked up the box at the post office, I almost giggled.
They were the cutest things, maybe ever.

At the moment they are camped out near the heater
in the living room of the farmhouse. In a few weeks
they'll be able to wander around outside. (It will take
2-3 months before I see any eggs from them.) And
that will bring on its own set of challenges. One of
those challenges, perhaps the biggest, will be the fox.

ian-knauer-cubs-484.jpg

There is a fox that lives in the old hay field, just above
the grape vines. She's raising four cubs. Every morning,
she and I stare at each other from a distance as her cubs
frolic and tumble in the spring grass. And, because I
know I can't out-smart the fox, I'm trying to make friends
with her. Just after sunrise, I bring her and her cubs some
food. It might be a leftover burger or some pork. So far,
I haven't fed her any chicken with the hopes that I might
foster a mutual understanding.

I am hopeful that she won't eat my chickens, and to that
end I'm fixing up the coop to give them a safe place to
roost at night. During the day, they'll be protected by
my dogs. Again, I am hopeful. I am also naive. If I'm
lucky, I'll be able to stave her off long enough to eat
some of my chicken's eggs this summer.

ian-knauer-asparagus-484.jpg

In the meantime, here's a recipe for my take on
asparagus vinaigrette, using purchased eggs:

Asparagus Vinaigrette
Active time: 15 minutes Total time: 25 minutes

Serves 4

1 1/2 lb. asparagus, trimmed
1 shallot, thinly sliced
1/4 cup cider vinegar
2 tsp. sugar
1 tsp. kosher salt plus more for seasoning
3 Tbsp. extra-virgin olive oil
1 Tbsp. capers
1 Tbsp. Dijon mustard
Freshly ground black pepper
1 hard-boiled egg

Blanch asparagus in a large pot of boiling salted water
until bright green and crisp-tender, 4-6 minutes
(depending on the thickness of the asparagus).
Transfer to a bowl of ice water to stop the cooking;
let cool completely. Drain and pat dry.

Place shallot in a small saucepan with vinegar, sugar,
and 1 tsp. salt. Bring to a simmer, then remove from
heat and let stand 5 minutes. Reserve 1 Tbsp. of vinegar
mixture, then drain shallot.

Whisk together oil, capers, Dijon mustard, reserved
vinegar mixture, and shallot in a small bowl. Season to
taste with salt and pepper. Toss asparagus with the
dressing, then transfer to serving platter. Force egg
through a sieve and sprinkle over the asparagus.

Thursday, April 14, 2011

The Last of the Ketchup, The First of the Garden

The last of the ketchup, the first of the garden

There is only one more jar of homemade ketchup left in the pantry. It is the end of last summer’s bounty and I’ve been putting off opening it. In fact, back in late February, I even bought a bottle of Heinz because I couldn’t bear the thought of opening my last jar of the homemade stuff so early in the year.

But now it’s April. The other night I made burgers and tapped out the Heinz bottle on the first bun. After it sputtered and farted out the last of its industrial-strength ketchup, I opened my final jar, noting the Sharpie’d label on the lid: “Ketchup 8/10”. I was fine doing this now, since a week ago I’d set up 100 new tomato plants in seed starters for this season’s crop. Also, I really wanted my burger to taste like it had been sun-kissed. And it did, because I made that ketchup at the very moment the tomatoes were perfectly ripe. I can only hope I’ll get the timing right again this summer.

I didn’t just start tomatoes last week. I planted 100 hot chile seeds, too, and cauliflower, kale, and collards, but let’s talk about them later. Right now, I want to tell you about a tomato seed that has me pretty charged up.

There are hundreds, if not thousands, of tomato varieties available for home gardeners on the Internet and in catalogs. One of my favorite sources is Southern Exposure Seed Exchange. Mostly I save my own tomato seeds from year to year, as I did for this year’s plants, so I often just skim over the tomato section when I’m buying my vegetable seeds. But one variety jumped out at me this year, and I’m pretty sure that’s because the pantry was so low on jars of homemade ketchup. This tomato is called Heinz 1350 VF.

The last part of its name—1350 VF—is an indicator of the plant’s crossbreed and its resistance to verticillium and fusarium wilts, which means it’s hardy. And “Heinz” means that it’s one of the varieties that the H. J. Heinz Company uses to make its famous ketchup; the tomato was introduced in 1963.

Heinz ketchup (as you know if you’ve ever tasted it) is one of the few perfectly balanced sauces in the world. Malcolm Gladwell wrote this beautifully researched story for The New Yorker all about how perfect Heinz ketchup tastes. The company is based in Pennsylvania (although it buys tomatoes from growers all over). My farm is also in the Keystone State. While I don’t expect my ketchup to taste exactly like Heinz, I know that using one of its tomatoes is not a bad move. I’m so thrilled about these plants that as far as I’m concerned, August can’t come too soon.

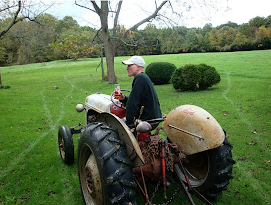
But there’s a lot that will happen between now and then. In this column, we’ll talk about the garden and its seasonal evolution. We’ll talk about chickens and ducks and bees and a stubborn old 1952 Ford tractor, too. We’ll talk about family and friends and cooking and eating.

Every week, I hope to bring you a recipe that will highlight a perfect piece of produce and how you can cook it to perfection. In August, it might be a Heinz 1350 VF tomato ketchup recipe. But for now, let me give you my favorite burger recipe. And, unless you have a lonely jar of homemade ketchup in your pantry that you’ve been saving for just the right moment, use Heinz. When it comes to ketchup, they know what they’re doing.

Beefy Chipotle Burgers Make 4 burgers 1 large garlic clove 11/4 lb ground beef chuck 1 tablespoon finely chopped chipotle in adobo Accompaniments: Ketchup; mustard; lettuce; tomato; onion; rolls Preheat grill for direct heat grilling. Mince and mash garlic clove to a paste with 1/4 tsp salt. Gently mix beef with chipotle, garlic, 3/4 tsp salt and 1/2 tsp pepper, then form into 4 (4 1/4-inch-diameter) patties. Oil grill rack then grill burgers, turning once, until grill marks appear and burgers are medium-rare, 4 to 5 minutes. Serve with accompaniments, namely, ketchup

Thursday, March 24, 2011

The Jedi Knight and The Idiot


I have two dogs. They love the country, as you might guess, and spend as much time outside as possible. Their personalities are almost opposite. Elvis, who I believe spent his last life as a Sherpa or a Jedi knight, often sits in the winter rye that is growing in the garden and contemplates nature.


Nelson, on the other hand, is sort of an idiot. This week he spent half an hour snapping at bees as they flew out of the hive to stretch their wings after a long, hard winter. Every few minutes he would get stung in the face.

After about a dozen stings he gave up. He walked to a little muddy stream that was plump from winter run-off and stuck his entire face in the mud to relieve the effects of the bee venom.


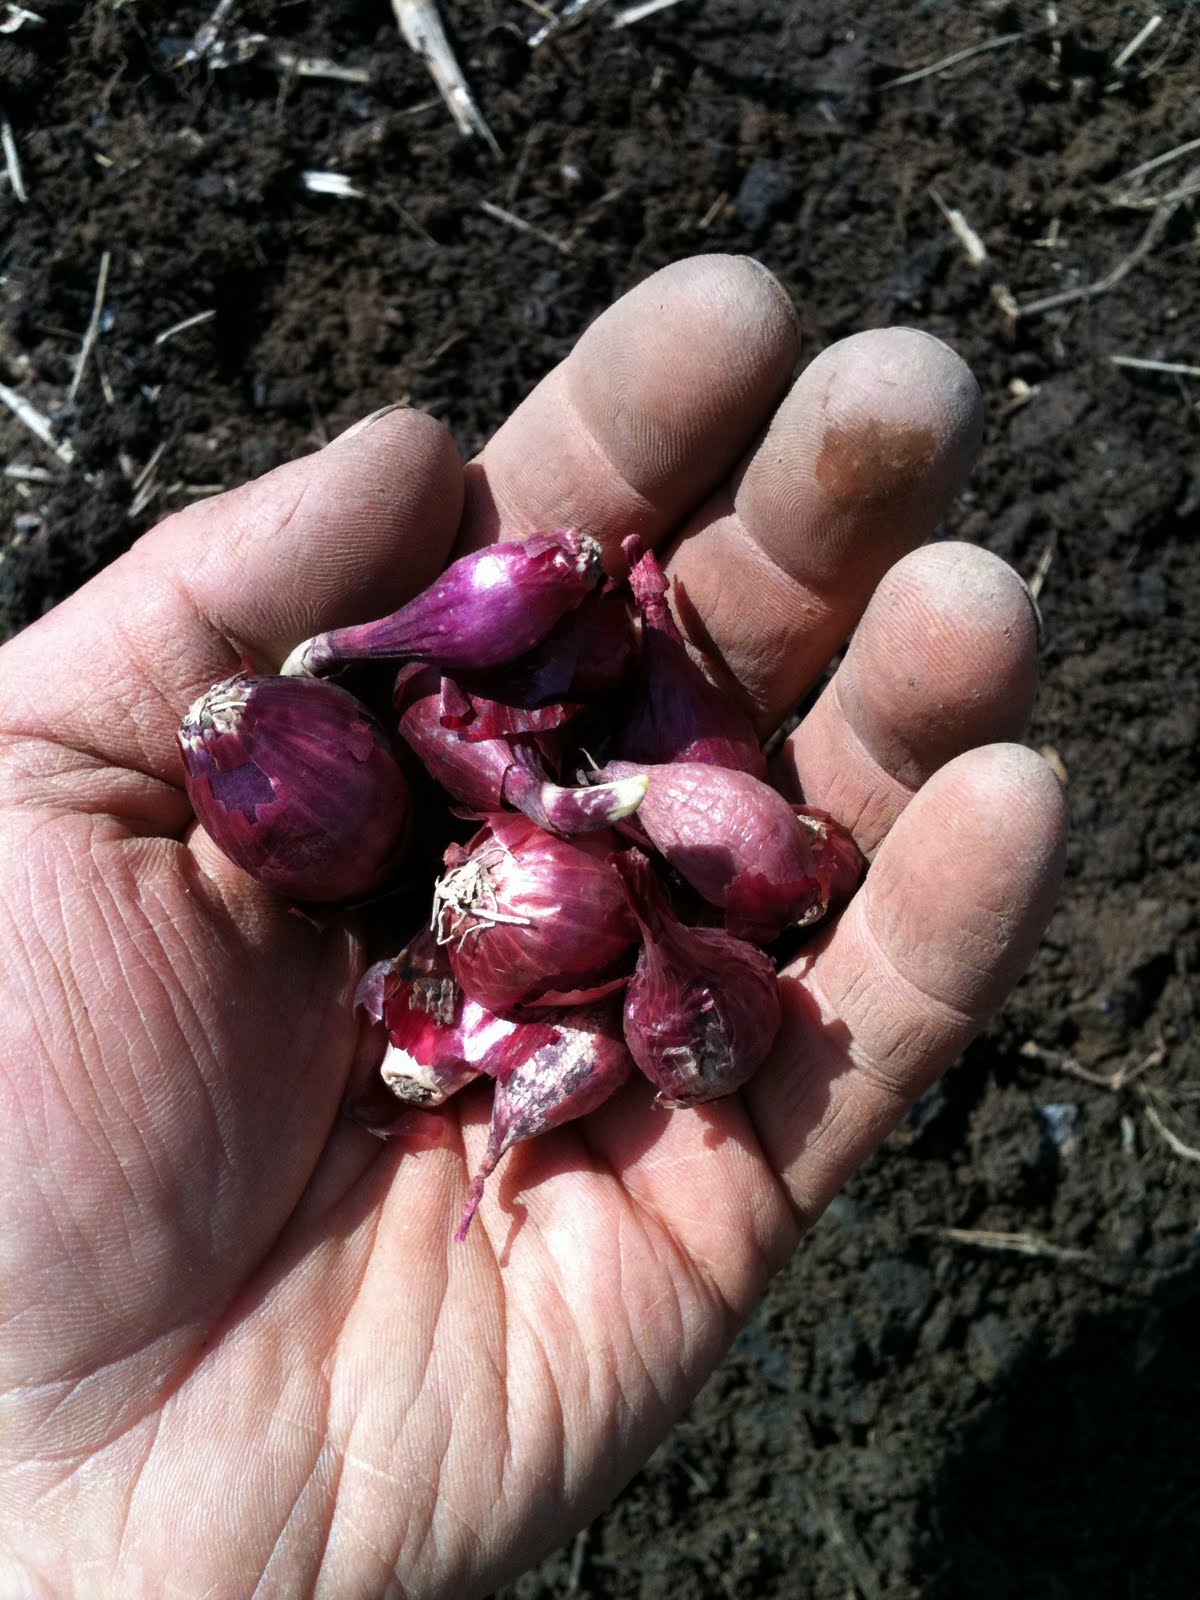
This all happened as I placed onion sets in the garden. The onions can stand the cooler spring and need extra time to get going.


Planting onions helps me relieve the sting of anticipation for real spring to finally happen by letting me get my hands in the muddy spring earth. It also gives me a few quiet moments to contemplate nature.


People take after their dogs, they say.